If you need to implement DNS-based verification (DNS-01), you can go straight to the GitHub repository of Enigma Bridge for all the details you need. We have published there information about dependencies, expected use (command line parameters for Certbot), as well as examples of our plugin’s output.
You may remember me questioning a couple of aspects of domain control verification in Letsencrypt. Thw write-up was based on unexpected / suspicious behavior while we were building this integration plugin. Certbot as the default client is continuously improving. What we found, however, is that there is still a missing piece for DNS and TLS-SNI verification of domain control so it can be automated.
This plugin is also one of our building stones for simple management of larger networks, which doesn’t seem to be adequately supported yet.
Problem
The problem is to get a letsencrypt client publish domain control verification data – in the right format and expected location. It is needed for Letsencrypt servers verify you own the domain and issuing you a new certificate you request.
But first the overall process.
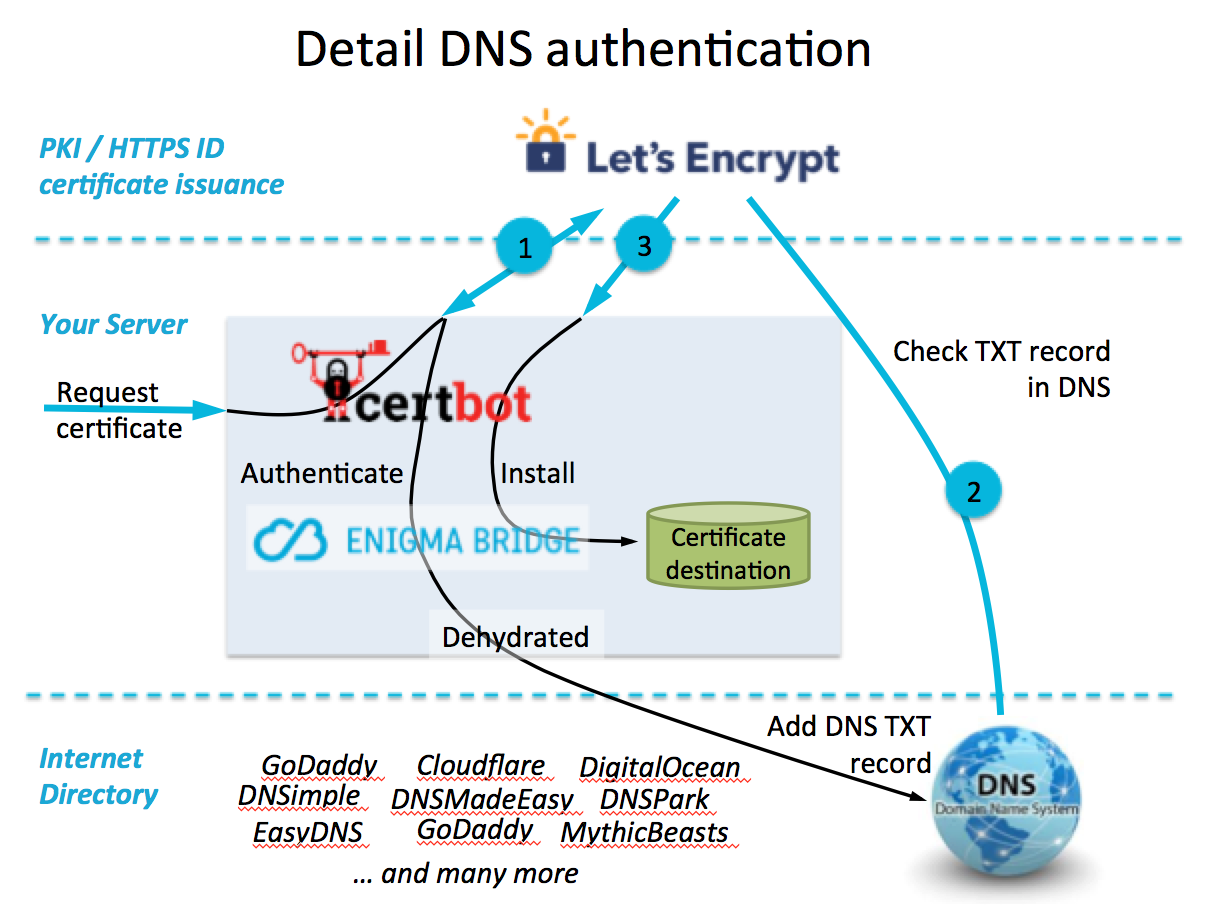
The picture below shows the three basic steps of certificate issuance. A client agent (e.g., certbot) will initiate a certificate request and obtains back verification data – step 1. The purpose of this data is to allow Let’s Encrypt CA verify that you can control your DNS domain name by inserting unguessable data to your webserver, change network configuration, or update DNS records.
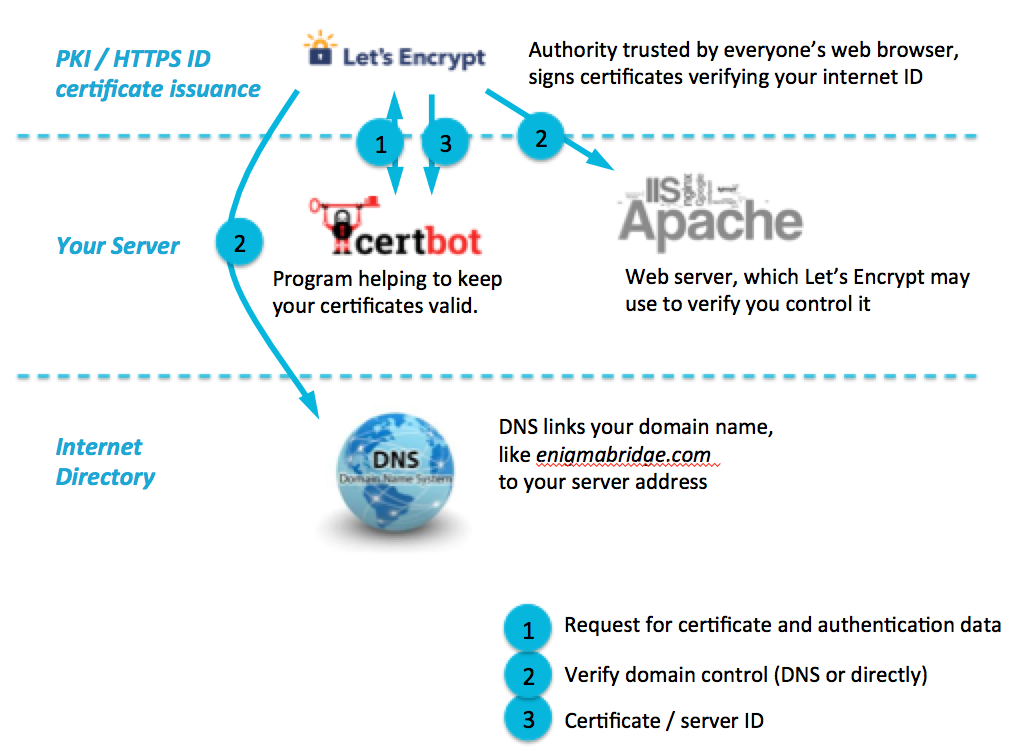
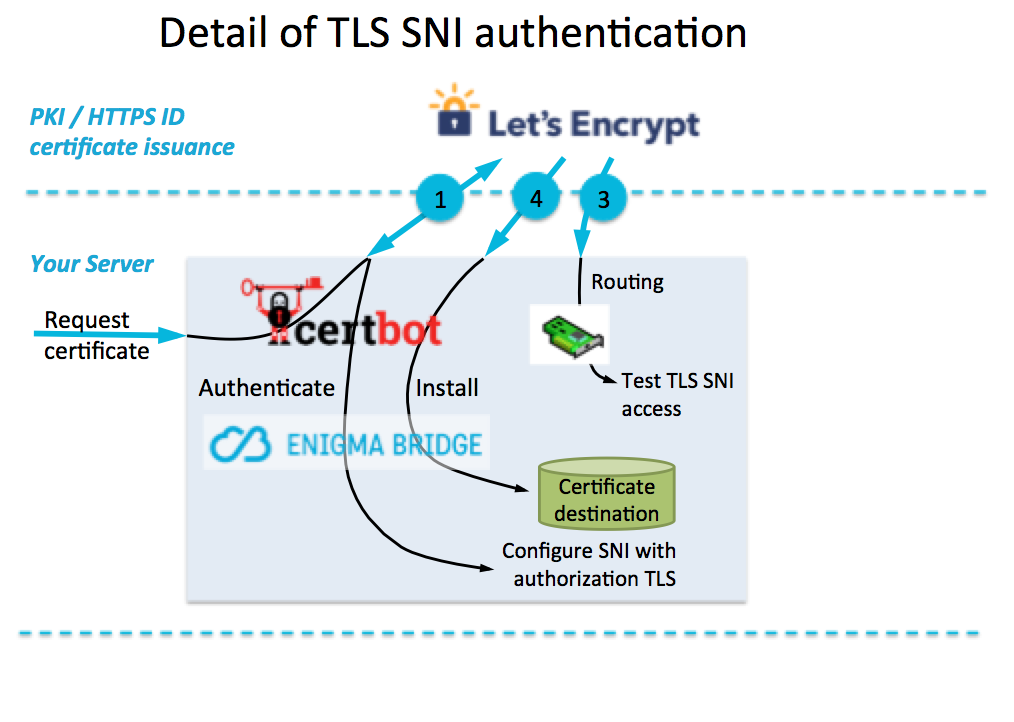
Step 2 is the actual verification of the domain control. Let’s Encrypt will try to collect the data it provided in step 1 using one of three methods. It will check the DNS records, or will try to download an agreed filename from your web server, or will connect to a verification domain (xxxxxx.acme.invalid) using TLS.
Note: I’m sure you noticed that the data verified in Step 2 magically appear where it is expected.
Once the verification is completed, Letsencrypt will create and internally store (for <several> days) an authentication token and a new certificate is signed, issued, and sent to your client.
You will be probably familiar with “http verification”, where you either start a temporary web server that will return a verification file, or copy the file to your web server’s document folder. While it’s simple, you don’t want to do it if you run a large website and any downtime is spotted and queried. That’s where other verification methods start being interesting.
Solution
The solution is to automate the verification process as it becomes complicated and possibly involves manual tasks that you’re likely to:
- forget in three months time; or
- start hating when you have to do it twice or more times a week.
This plugin is a part of our effort to simplify, improve control, and provide users with more visibility of what is going on. Especially when users are not experts in security or just don’t want to spend too much time on this. After all, it’s just an infrastructure management task that should just work.
This plugin offers three modes:
- handler mode – it directly calls handlers (e.g., Dehydrated for DNS management) to publish verification data;
- JSON mode – data for verification is returned in JSON format for automation tools, e.g., Ansible, Puppit, Chef, or similar;
- manual mode – it shows human (read “user”) readable text to help you do necessary changes by hand; this is a fallback option when no automation is available.
That’s it, you can check the Enigma Bridge GitHub repository for examples in the README file. If you want to chat or would like to explore options for more complicated deployments, get in touch!
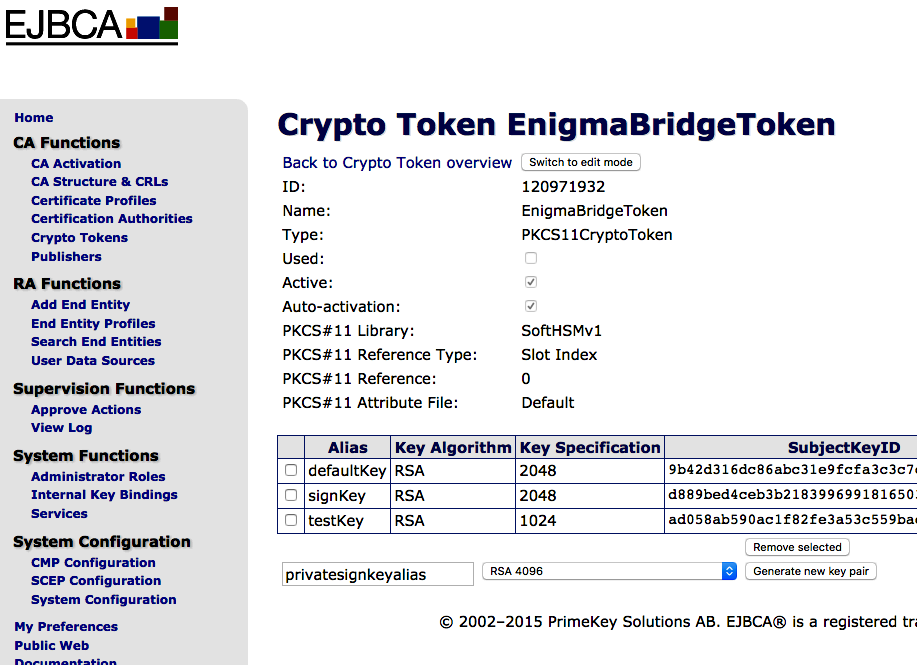
If you are interested in PKI and certificates for your internal network / private cloud, have a look at our integration of
PrimeKey PKI with secure hardware protection of its keys and DNS management. We work hard to list it on Amazon Marketplace. Get in touch, let’s chat.
Currently Working On …
Automating TLS-SNI for private networks …